AutoTune
Automated VE table optimisation using logged fuel trim data
AutoTune analyses your logged fuel data and calculates an optimised VE table that best fits the measured air/fuel ratios across your entire RPM and load map. Rather than correcting one cell at a time, it considers the whole table simultaneously and produces a smooth result that respects the physics of how a VE table should behave.
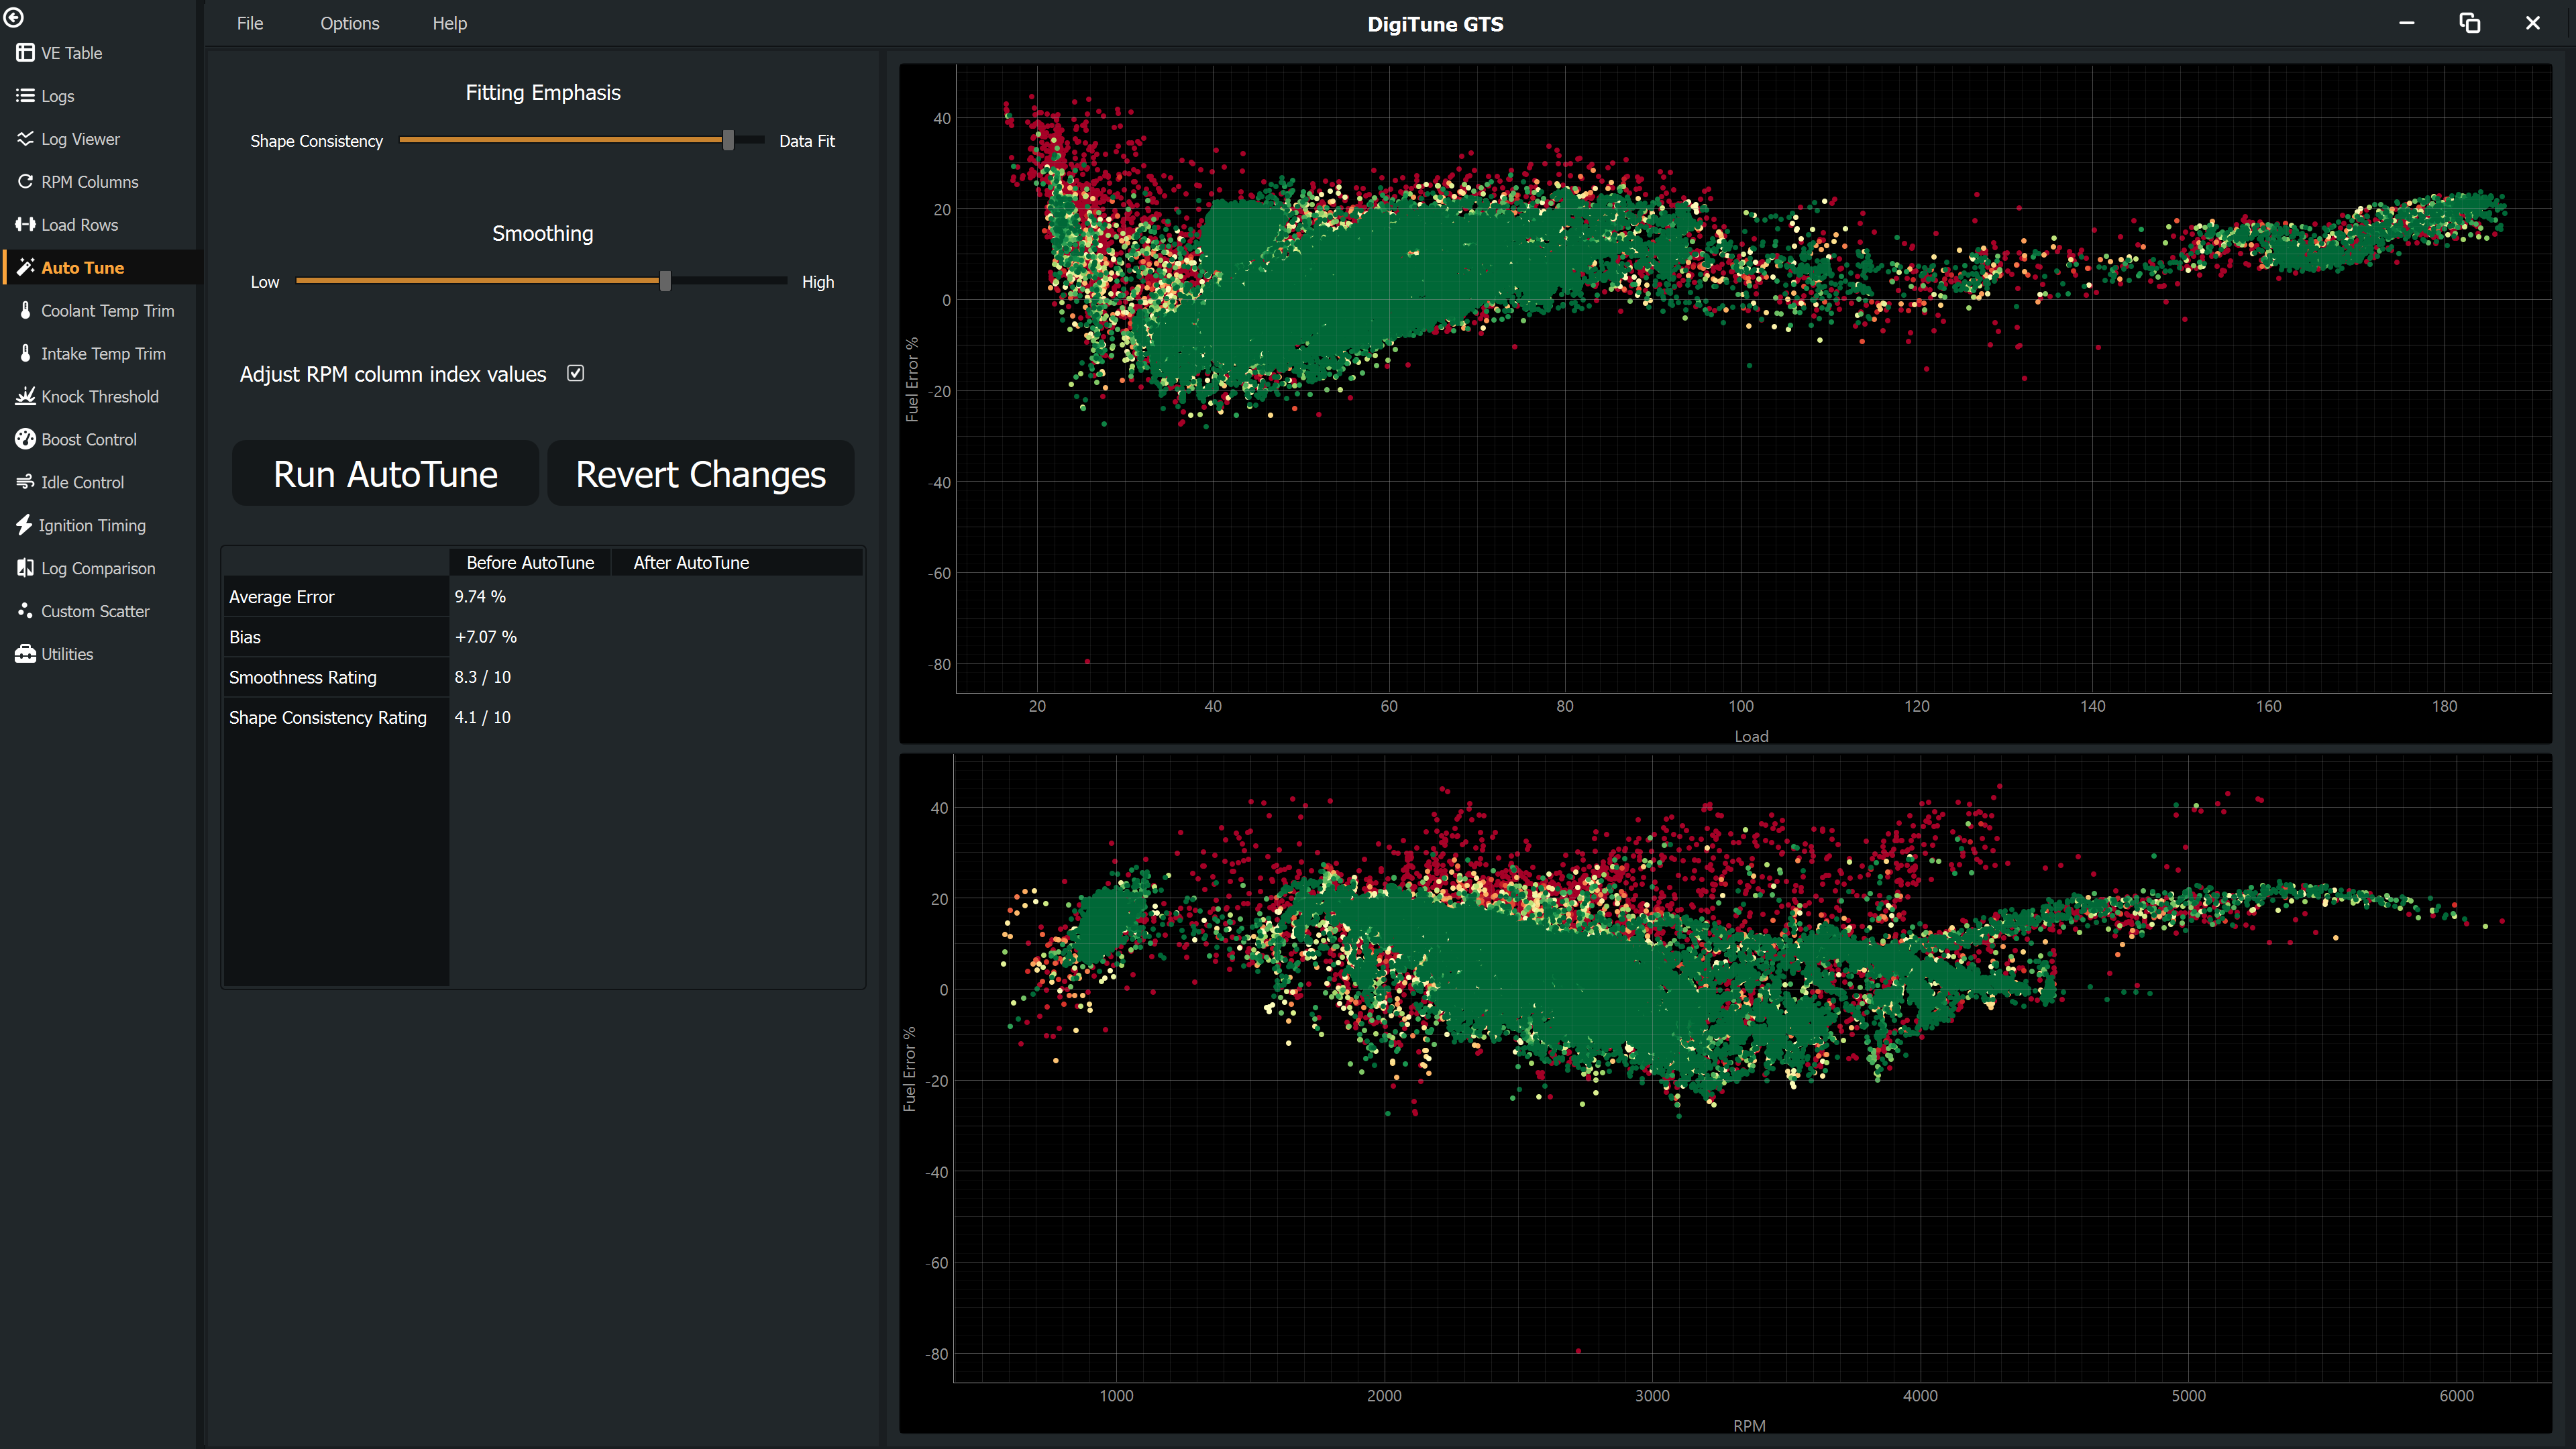
Before you run AutoTune
AutoTune works best when your logs contain good coverage across the load and RPM range you want to tune. Check the following before running:
- The total log duration is sufficient to provide reliable statistics across the desired RPM and load range. (20 minutes minimum)
- The AFR sensor was functioning correctly — check the log warnings dialog that appears on load.
- You have reviewed the scatter plots on the Fuel / VE Tuning pages and understand roughly where the table is lean or rich.
The sliders
Smoothing (0 – 100)
Controls how smooth the resulting VE table is. Higher values apply stronger regularisation, which prevents the algorithm from over-fitting to noisy data points at the cost of some accuracy in cells with genuine steps.
- 0 — Minimal smoothing. The result follows the data very closely but may have sharp, unrealistic steps between cells.
- 50 (default) — Balanced. Generally a good starting point for most engines.
- 100 — Heavy smoothing. Produces a very smooth table. Useful when log data is sparse or noisy but may under-correct obvious steps.
Fit Emphasis (0 – 100)
Controls the balance between preserving the existing table shape and fitting tightly to the measured data.
- 0 — Shape priority. The optimiser strongly prefers to keep the existing relative shape of the table, making only the minimum corrections needed. Good when your base table is already well-structured but shifted.
- 50 (default) — Balanced. Recommended for most situations.
- 100 — Data priority. The optimiser fits as closely as possible to the logged measurements. Use when you have excellent data coverage and want maximum accuracy.
Running AutoTune
- Navigate to the AutoTune page.
- Review the Before error graphs. These show the current distribution of fuel error by load (left) and by RPM (right). Large bars mean the table is significantly off in that region.
- Adjust the Smoothing and Fit Emphasis sliders to your preference.
- Click Run AutoTune. A progress bar appears while the optimisation runs.
- When complete, the After graphs appear showing the predicted error distribution with the new table values. A lower overall error indicates a better result.
- If you are satisfied, click Update to commit the new table to the in-memory calibration.
- If not satisfied, click Revert to restore the previous values, adjust the sliders, and run again.
How AutoTune works
The algorithm varies slightly depending on whether your ECU uses MAP-based (Speed Density) or TPS-based (Alpha-N / ITB) fuelling:
MAP-based (Speed Density)
A weighted regression is performed per RPM column. A global load shape is derived from the data, and per-column scale and offset factors are calculated to match it. The result is then blended with Tikhonov curvature regularisation — a mathematical technique that penalises rapid changes between adjacent cells — to enforce smoothness. The load axis is also checked for monotonicity (each row must be a logical step from the previous one).
TPS-based (Alpha-N / ITB)
An orifice flow model seeds the table from wide-open-throttle (WOT) data, which tends to be the most reliable data in a TPS-based calibration. The algorithm then iteratively corrects cells at lower TPS values using the same regularisation approach.
3D trims
If your map includes IAT and CLT trim tables and the relevant channels are present in your logs, AutoTune incorporates these corrections into its analysis so they are not double-counted in the VE table.
After AutoTune
AutoTune updates the VE table in memory. You should then:
- Review the updated table on the RPM Column and Load Row pages to check for any unexpected values.
- Save the map file to write changes to disk when satisfied.
- Consider doing a short validation log after loading the updated calibration to the ECU, then running AutoTune again to refine.
Advanced settings
The following settings in Settings affect AutoTune behaviour:
- AutoTune Gradient Smoothness Factor — weight of the smoothness penalty (default 20).
- AutoTune Shape Commonality Factor — weight of the consistent-shape penalty (default 20).
- AutoTune Load Weighting Offset — bias value; higher values reduce the influence of low-load data points (default 30).
These are advanced parameters. The slider controls on the AutoTune page are the primary way to adjust the result; change these settings only if the sliders alone are insufficient.